d2 Profiles
Using d2 Profiles creates an easy and simple to understand environment for all your users. You can create customized user profiles for every category, so that all your customers have only those fields available that they need and are not overwhelmed by hundreds of other options in the Joomla settings.
Installation
First you need to download the installation package. Make sure it’s the latest version!
After that log into the backend of your Joomla website and go to System – look for the “install” column and then find – Extensions. There you’ll be met with a “drag and drop” upload. Now you can just look for your file and plop it in there (or upload it – your choice). You don’t have to do anything else, just waituntil the installation is complete.
The d2 Profile will then show up in the “Components” Menu.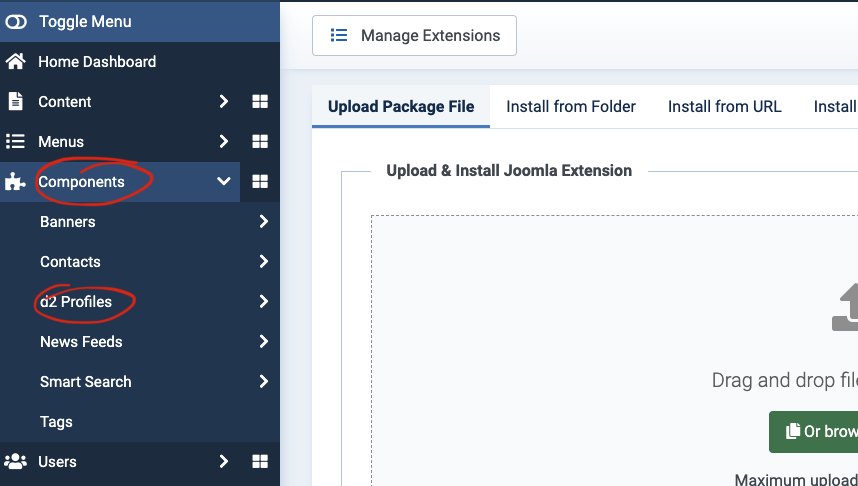
If the installation process is not clear yet, follow this link to a more in-depth explanation on how to install extensions in Joomla: https://data2site.com/documentation/installation
Configuration and configure options
Alright, by now you should’ve installed d2 Profiles. For the extension to work we need to activate two things (meaning plugins):
Go to Components – d2 Profiles – Dashboard. Don’t be shocked – we’ll turn all the red boxes green in a minute. First, you’ll need to click on the box that says, “System Plugin UNPUBLISHED!”.
Now we want it published, which we simply do with a click on the grey X, that should then turn into a green check mark. 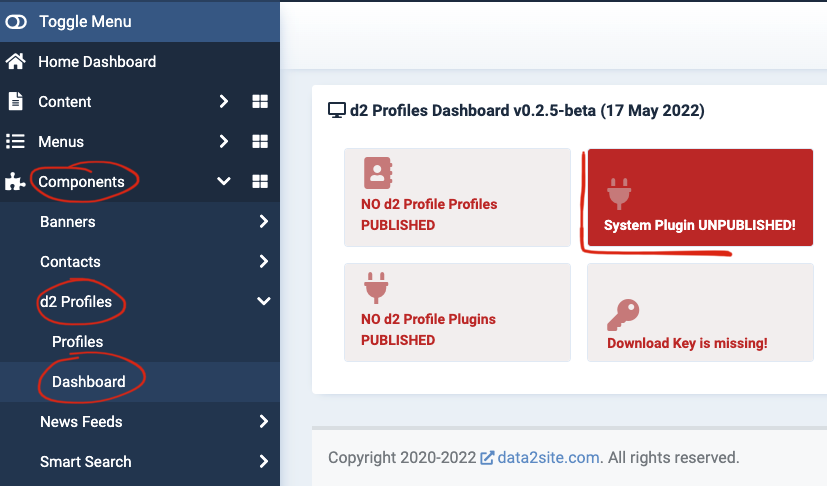
Then go back to Components – d2 Profiles – Dashboard. The next plugin we need to activate is called “NO d2 Profile Plugins PUBLISHED”. Here you’ll want to publish the “d2 Profiles – Articles” Plugin. 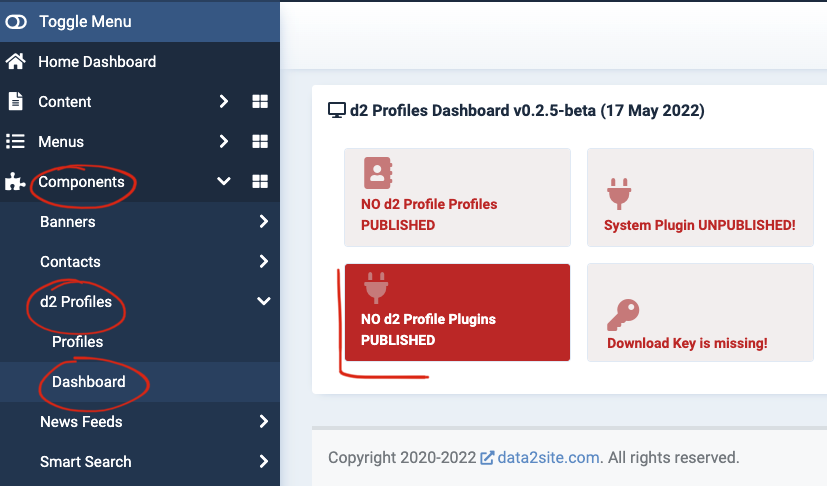
Then go back again to the dashboard and open “NO d2 Profile Profiles Published” – this is where you want to go every time you would like to create a new profile for you customers to use (or you can just go to Components – d2 Profiles – Profiles) 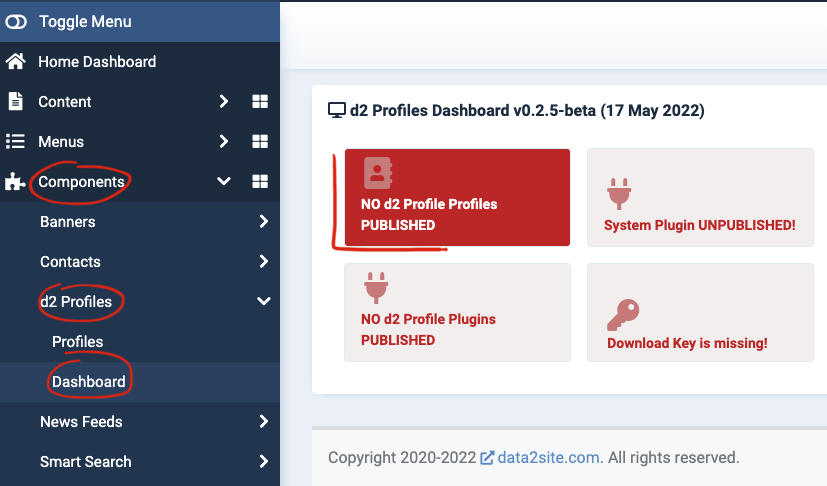
Creating a Profile
If you don’t know where to start or what options you can choose from, we recommend importing our standard profile that has all the fields included.
However, if you feel like creating your own profiles, go ahead and click “New” and give your first profile a title. Then choose “Articles (com_content)” as your Component and your Client will be “Admin”. For View choose “Article” as the profile will then only be shown if you open an article. Then save.
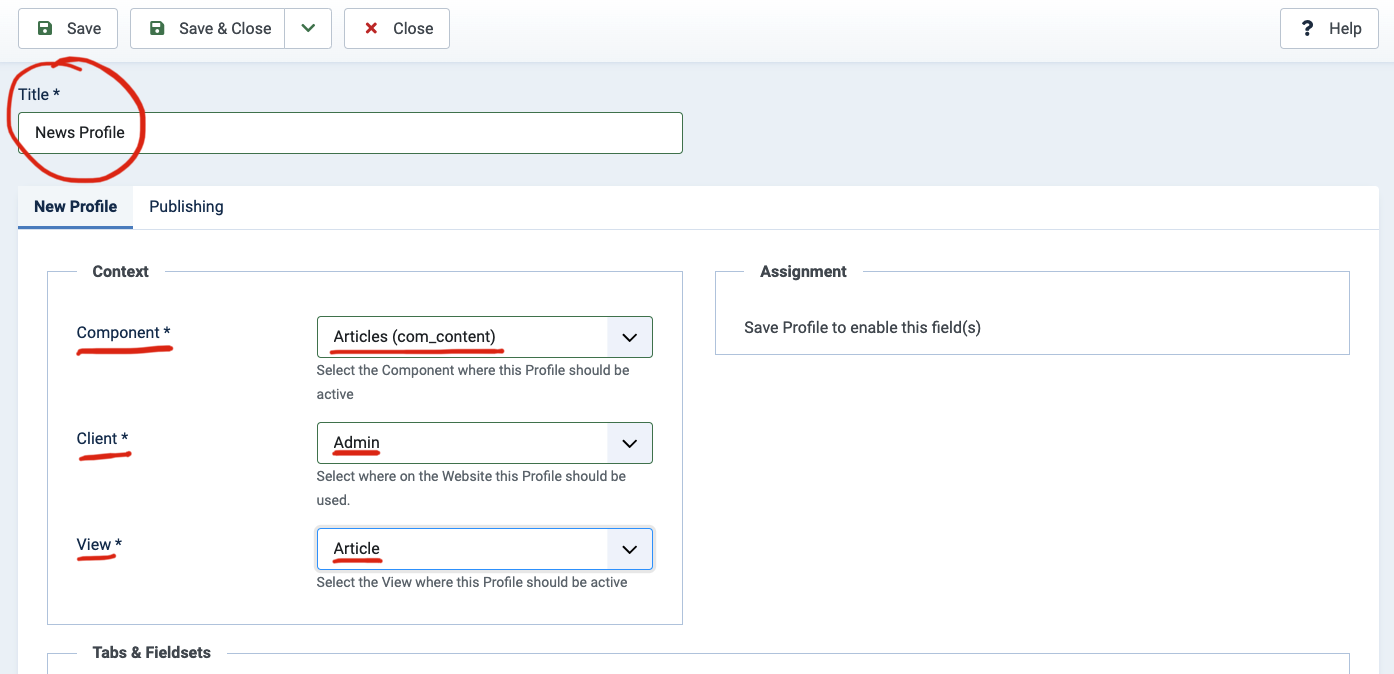
After saving you can fill out the fields in “Assignment”. Here you can decide if the profile should be limited to any user group and select for which category/categories the profile should be used for. Then save again.
Now that the basics are done, we can move on and start crafting a customized profile.
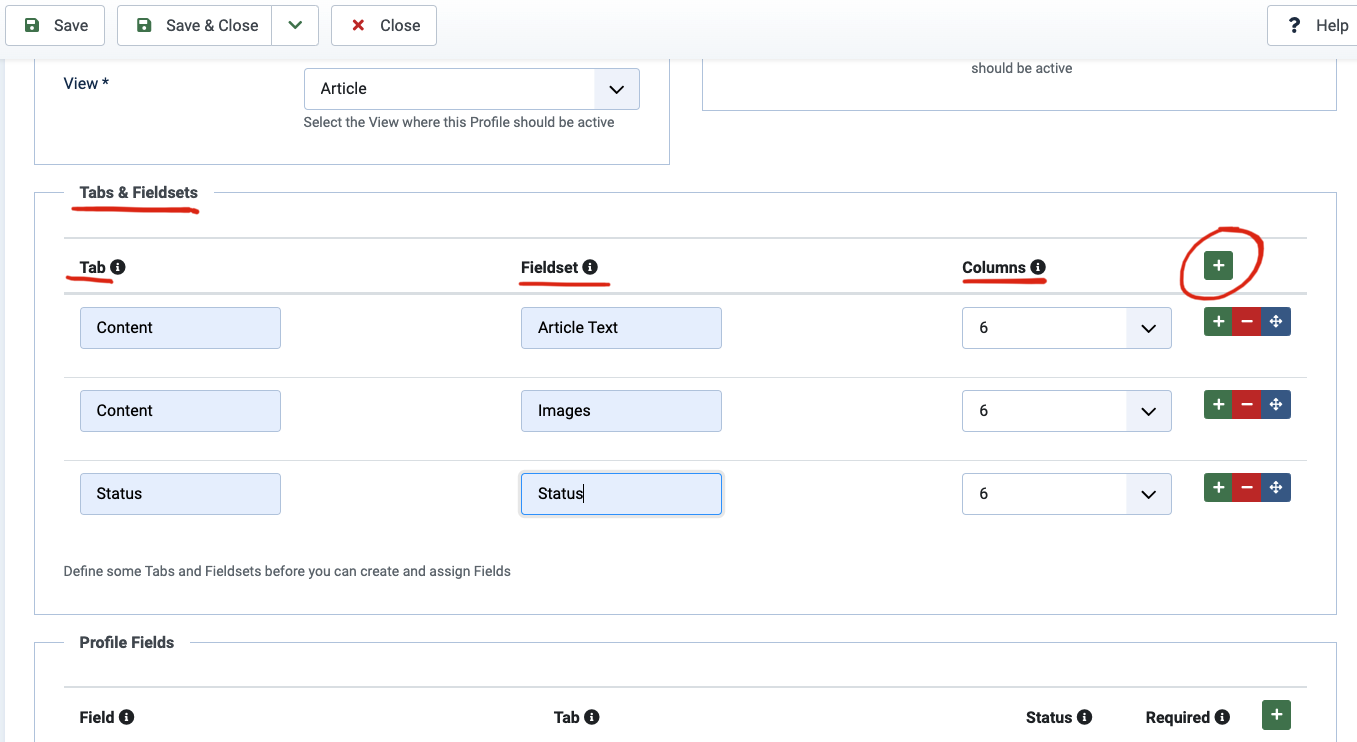
First you need to create our Tabs and Fieldsets – you can name them however you see fit (but I would recommend staying with the names Joomla is using, nonetheless). Following is a description of all the options:
“Tab” is the “highest” field, meaning that you can use a tab-name multiple times and everything that is under said tab-name is on one “page”.
“Fieldset” is used for categorizing fields and order wise it is placed under “Tab”. Every fieldset has one name, under which the fields, that need to be filled out later in the article, will be shown.
“Columns” will determine the size of the fields. Here you can configure in which 12 (bootstrap) columns the fieldset will be displayed. For each “Tab” the sum always has to be 12 for each row.
Now moving on to the “Profile Fields”. These are the ones that the users actually can fill out, like in a normal article without the plugin. Click the green + to create your first field.
The “Field” gives you all the Joomla options to select from. So you’ll choose what kind of information needs to be filled out, be it the category (which is always to be included by the way!) or the intro image, a link or the publishing informations…
Now you have assign the fields to the “Tab” and “Fieldset” you want it to show up in. Furthermore, you can decide whether or not this particular field should be required and with the “Status” it will either be shown in your profile or not. Save and close the profile and you’re done. You have now created a d2 Profile!
Using the d2 Profile
Go to Content – Articles and open (or create) an article with the category you chose for your profile. You will see that now only the tabs you came up with are visible. This makes the whole creating-an-article process easier for you and your customers.
Additional Information, that is good to know
Import and Export Profiles – you can export the profiles you created and use them for other websites and/or you can import already finished profiles from somewhere else.
Joomla default profile – this profile is a good way to start. It shows all the options that you can select for your fields and gives you a general overview of all the content that can be created.
Articles List & Intro Images – this creates thumbnails of any intro image in the articles, which are then shown in the general list, so you can now quickly scan all your articles visually
For this option to be activated you have to go to System – then look for the “Manage” field and find – Plugins. Then open “d2 Profiles Articles” and click “show” where it says, “show images in articles”.
